Friday, January 31, 2014

Dawning Snowflake Tutorial


I'm really excited to been asked to make the February block of the month for the Misfit Quilters! Even though I am called The Valkyrie, there is still a bit of a romantic in me, and it really starts to come out in February. This past month, I witnessed what was probably the most romantic thing I’ve ever seen: snow falling with no clouds in the sky…during a sunrise! All I could do was go outside and spin and spin and surround myself in diamonds in pinks and oranges and lemon yellows. So instead of doing the usual hearts such for the month of love, I wanted to do one of those snowflakes.

I found the most delightful pattern through called 'Snow Cristal’ from Joanna at Shape Moth. It is a paper piecing block, but it is super simple. The finished 'Snow Cristal’ block is at 10.5”, however she suggested either add on the background as you completed each triangle. Or, you could cheat like me and make this into a mug rug for a Valentines gift.

So grab your fabrics and download the free PDF pattern here, and lets at it. Oh, just a few tips:

  • Test the accuracy of paper-piecing patterns. My printer has a habit of going to 97% automatically. Double check with a ruler! If you can, get some of the foundation paper, or the Big Chief paper we used as kids or even go to your local newspaper and see if they have any they can give you. The paper is MUCH thinner and easier to tear away.
  • To make removing the paper foundation from paper-projects easier, set your sewing machine's stitch length to a short setting. Not so short that if you have to frog you can’t but the perforation is what makes it easier to tear out. I like to shorten it up to about 15-18 stitches per inch. Every machine is different.
  • If in doubt, use a set of tweezers to get those little paper pieces out of the way.
  • Remember this is just paint by numbers from quilters. sometimes I will take a set of crayons and mark what colors I want to go where so I don’t mess up.

Step 1:

Print out 3 copies of the triangles. Double check 100% scale, no scaling. She has a 1” box right there, whip that ruler out on the first one and go at it.

Step 2: 

Using your rotary cutter and ruler, trim the foundations 1/2″ (at a minimum) from the outside solid line.

Step 3:

Select the #1 fabric piece and position it RIGHT SIDE UP on the BLANK/BACK side of the paper over the #1 area. Be sure that it covers the area completely with at least 1/4″ (at a minimum) all around the #1 area (hence the ½”more). Either tape the edges in place or pin it. I like to pin, it’s just a preference.


Step 4:

Find the line between #1 and #2. Fold the paper over the edge of the ruler exposing the excess fabric beyond the #1 seam line. Place your ruler along the edge of the fold adding ¼” to edge and trim away the excess fabric. If you tape, be sure it’s not on a sewing line!


Step 5:

Measure out and cut out ½” larger than need (at a minimum) the #2 fabric.

Place the #2 fabric with the previous #1 piece along the just trimmed line, right side together and double check that it really will cover all of the #2 area by “pretending your finger is the seam.” Then flip it back into place along the just trimmed line of the #1 piece and pin in place.


Step 6:

Place the block with the lined side up under the presser foot and sew on the line, extending the stitches ¼″ on each end.

Step 7:

Remove your pins and tape and press the #2 piece open!


For the Next Lines:

For the #3 line, follow the same sequence of trimming, sewing and pressing as described in the above steps. Also, when you extended the stitching on each end of the line? When you fold along the #3 line, you will need to pull away the stitching from the paper at the pointed end and that is completely ok! The fabric will still be stitched in the seam allowance area!

Section 2 - 3


Section 3 - 4


Section 4 - 5


Section 6 - 7


Section 7 - 8

OK I spaced, I forgot to take a photo here. Grrrrrrr.....

Section 8 - 9


Section 9 - 10


Section 10 - 11


Section 11


Once the #11 piece has been sewn you will need to trim up Section 10 and 11 1/4″ from the outside sewing line you can attach the rest of the triangles.


HA! Triangle 1 done! 5 more to go! So…


So, now you have all these fun triangles, and if you were like me, I flipped out. WAIT? Triangles? Put together how? Duh Keri, one at a time.

Step 1:


Step 2:


Step 3:

Steps 1 and 2

Step 4:


Now, I've heard from others that to make a 12" block, they appliquéd this on. A direct quote from the designer is:
*What you need to do is cut from the background fabric two rectangles - 15,5cm x 9cm (that would be about 6 1/4in on 3,5in) and cut a diagonal line through each rectangle [see number 14. in the tute from the link above].

*Sew them to the hexagon and square it [see number 15. and 16. in the tute] to 12" wide.

*Add 1.5in strips to the top and bottom [see number 17. in the tute] and if neccesarry cut away the excess. I'm not really good in measuring everything exactly... I always cut more than needed and trim away the excess...

I on the other hand like it just like this and am off to go finish up my mug rug!
Enjoy!


Profuse Patterns Abound

I can't help it.  I'm a sucker for a good pattern.  I should be at the stage of the game where I am making my own, but you know, with so many amazing designers out there like Canoe Ridge Creations, V and Co., Tula Pink and Gen X Quilters, and on and on...well, I guess I'm just sort of in a bit of a comfort zone at the moment.  I LOVE the fact that quilting is not just for the country-granny-ducks and geese-floral-fluffy-Holly Hobby movement.  It's encompassing all of it.  The contemporary/Modern and the Traditional/Classic.  Hence the tension and drama.


Tuesday, January 28, 2014

One Day At A Time

It's been a really, really hard few days. I mean throw hands up in the air-demand why answers-want to give up-walk away hard. My head is screaming to be pessimistic and deposit all sorts of negative, dark things. My heart is telling me to not, to stop, Breathe and Listen since I'm having a difficult time Seeing. Art is my therapist. Fabric is my medication, the machine humming is my meditation. I am Learning how to Hear colors and Feel vibrancy and it's a unyielding lesson, but it's making me a better artist, a better person, and hopefully a less bitter one to boot. I should be in this unhinged-unholy rage stage about loosing my site, honestly I'm not. It can take me over, or I can learn a new way to do this. I'd rather learn. So, to my fellow artisans (you all know who you are) Visual, Auditory, or Whatever you are about, take a moment and try to encompass your other senses and pour your spirit and zeal into it. Just try. For me. I need your support and encouragement so much right now. I am so scared but I know I can. If a musician can make a cello sing to a popular song, add a dash of Beethoven, his own Sprit and a lot of Energy, then I can do this to my art as well.

I will leave you all with this beautiful quote and piece of music that will both Enlighten, Enchant, and Exhilarate to set you on your way:
Don't only practice your art, but force your way into its secrets; art deserves that, for it and knowledge can raise man to the Divine. - Ludwig van Beethoven
 

Friday, January 24, 2014

Photography + Coffee = Every Photographer I Happen to Know Giveaway


I’ve been in the process of learning how to photograph my quilts with natural light.  I’m trying to figure out unique styles and perspectives as well as learning how to bounce light so it’s not just direct but indirect so I stop all those really harsh shadows.  The key is I still want to be able to show off the stitching.  It’s been a massive learning curve, and one I’ve truly enjoyed tackling.  I just read a wonderful article by Anne Sullivan from Play Crafts (seriously, click the link and go read.  She did a fantastic job) about shooting quilts and the difference between indirect and direct lighting as well as what happens to our fabric colors under the various light bulbs, natural light, and so on (I’ve known this for years due to my SLR work and lab time, but it was a good refresher).


So, I’m looking for your input and suggestions as to “How To Train a Non-DSLR Photographer To Think She Can Do This.” I have 25 quilts thus far this year that I am going to need to shoot. At a minimum I’m thinking I’ll have at least 10 more added to that list by June.  I live in one of the most amazing states for lighting and backdrops (Montana). No, I’m really not into that whole country-barbed wire-cow next to the chicken- looking shoot. I have the Bridgers and Spanish Peaks in my back yard and I’m 90-minutes away from Yellowstone. I mean come on tell me that isn’t a great excuse for a road trip!  What I do need are tips and techniques that you all have and use that you don’t necessarily think about that would be good for me to learn and apply to my new skill set.  Should you be interested, there’s a thank you involved.  Leave your tip for me in the comment section below. Be sure you have “Liked” me on Facebook as well as Instagram/VSCO/Afterlight (I’m having so much fun with these apps!).  I will put everyone’s name in a random generator and on Monday, 27 January I will draw the name out to win this:


Saturday, January 18, 2014

The Fusion of Two Projects


So, I got in way over my head. Again. But in a way this was a good thing because it lead me to a very important situation.  This Yule, I received a fat quarter stack of Island Batik's "Courage" collection from their Quilted in Honor line.  The hope was that I would have time to make on of the quilts to enter into the contest and have it donated to a solider. Now,  I snicker not because of the whole giving it way thing, but because I apparently thought I was going to have time.  (insert laugh track here)
As I looked around to my friends who are soldiers, a good percentage of them received quilts through various organizations when they got home from OIF/OEF.  All but my husband.  He's never received one. At the same time I was pondering this, I came across the Gen X Quilters's Visa Versa BOM. Again, because I have the time, right? I'm also part of Canoe Ridge Creations Fresh Mini Quilt BOM and then there are those pesky orders that keep dragging me away from my dreams of doing a hostile take over of quilt shops that had managed to mess up orders or owners that rub me the wrong way.

So, I have a plan. I'm going to make Warrior Husband his own "Welcome Home" lap quilt using the "Courage" collection and doing the  Gen X Quilter's Visa Versa BOM. Kinda satisfy 3 things at once.  The quilt will go to an Army Veteran, I get to play with the BOM blocks and doing so will keep me on track with the quilt, and Warrior Husband finally gets a quilt by me no less!  SO I've already named it, "13 Bravo" which was Warrior Husband's MOS in the Army otherwise known as a Cannon Crewmember.  The Army definition is, "Cannon crewmembers work the howitzer cannons that support infantry and tank units during combat, and play crucial roles in the Army’s success on the battlefield." In other words he got to make a lot of really loud booms.


Friday, January 17, 2014

Happy First Birthday, Bentley


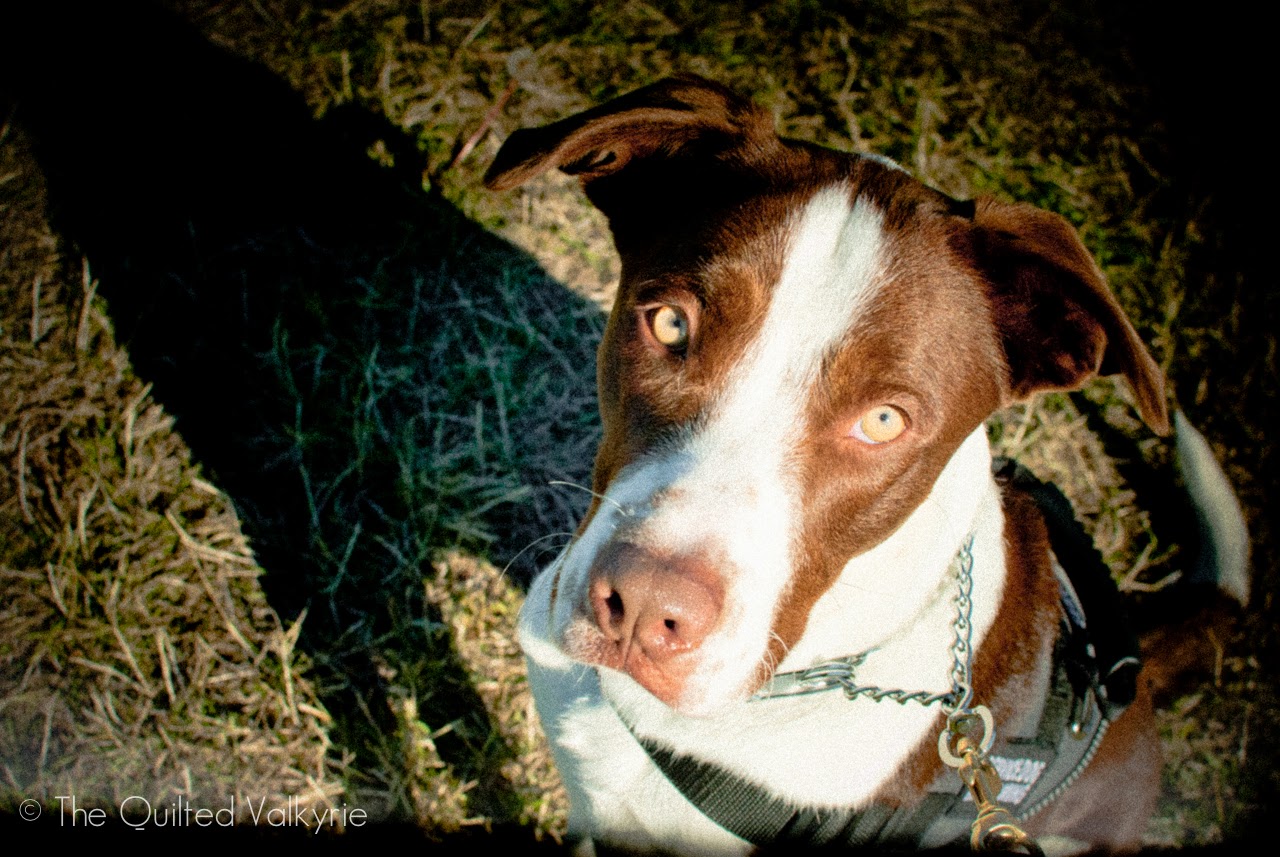
Happy first birthday, my sweet Bentley. You did it! You managed to survive a really reprehensible year. One year ago on January 18th, you were born in Wyoming into a horrid situation and managed get to yourself rescued thanks in part to a hunting dog rescue group. Little did you know that you would go from scrawny, barely surviving, lonely and scared puppy to a loud, always on the go home where you are loved, thriving, with someone, and now working towards a service dog job. Just within these few months of us being together you have taught me so much about myself and the way we can work together as a team. A few months ago, I sat down and wrote a letter to ask for you in my life. 3 weeks later, you and I found each other at the shelter. Your tail was thwapping against the cold, wet cement floor. Your eyes were so gold and begging me, “Hey, lady! Look at me! I’m right here! I’ll be your Forever Dog! Just look at me please!” Thwap, thwap, thwap. I could not NOT look at you! I circled the kennels 5 or 6 times; I kept coming right back to you. The folks that ran the shelter said you were an OK guy, very energetic, good with kitties (WRONG!) and needed a high energy dog/buddy to play with. Hey, lady! Please don’t let me stay here! Please I’ll be good! Look at me! Please I’m so cold and hungry! So you and I walked out together to play for a bit. You liked to play tug with me, you remember? I do. Your tongue lulled out and you looked like you were laughing. My heart was melting…hard. So then you and I went to meet Papa and Charlie. The nano second you and Charlie were allowed to go play, that was it. You had to be mine. But it wasn’t until the other night when I knew within my heart that we were supposed to be together.


It was right after you took off after the deer and Papa found you so very far away from me the other night. I was so scared for you, sad, upset, you name it. When you got back in the house you knew you were in trouble and the look on your face was one of, “Oh yeah, this is much better in here.” Latter that night, I had that night terror about being beaten up. You know, the one I usually have with the bottle being slammed down on the top of my head over and over? Then Papa and everyone else I love gets up and leaves me totally alone and I’m scared. Yeah, that one, except I woke up to you licking my cheek. I was crying, and you were waking me up and licking my cheek. When my eyes opened up you gave me one more lick and then curled back up on my side and forced your head under my numb hand and demanded pets, making the blood to move from my clenched fingers. You then began to snore your loud puppy snores, and I laughed to myself, allowing me take a deep breath. It worked. I was able for the first time in years, to curl up around you and go back to sleep and not get up and “forget” about the “dream” by doing something else starving my body of rest.


I know we have a lot of work to do, Mr. B., but I wanted you to know you are my Hero. You are really doing quite well at getting your Job, and even though we still have lots to do, you are a fast learner. You are starting to get used to not chasing Edelbrock, and last night was an amazing feeling being able to pet both of you at the sometime! I’m so glad you have Charlie as a buddy to play with and model from (even if you do like to use my bed as a trampoline!) Most of all, I want to thank you for your unconditional love and affection, even in this short amount of time. Thank you for your puppy kisses, the cuddles and the foot in my back when we nap together. You are my Rock Star, Bentley.
So, tomorrows birthday breakfast will be bacon and scrambled eggs with a hit of salmon oil and a yogurt/peanut butter/pumpkin cookie. Then we need to go on our Group Walkies with Charlie and Rockie and Legion. After that, you get to do whatever you want. Look at the difference one year makes!

Happy birthday, Bentley. I love you.

Momma


Friday, January 10, 2014

Padded Camera Strap Sleeve Tutorial


This is a lightly padded camera strap cover for DSLR and SLR cameras! Dress up your ho-hum DSLR camera strap with this fun, easy to wear cover. This strap fits over your existing manufactures strap, and is easily removable and washable. The straps are lined with a lightweight fleece to take that harsh edge of the existing strap around your neck.  Each strap has a pocket large enough for most lens caps to fit snuggly, 2-SD card holders and one “ear” to hold things of like a light weight stuffed animal of you are working with kiddo’s! I made these because the the leather tabs were getting in my way and bugged me as I was shooting. I wanted something wide enough to stuff my lens cap in “snuggly,” as I’ve lost 5 with loose pockets, and 2 extra SD cards. This size fits popular Nikon, Canon, Pentax, Samsung, etc. 1.5" straps but if you are using a wider than normal lens, make sure you adjust your width to accommodate for it!


Fabrics and Interfacings:


Cutting Instructions:
 - Main Fabric: 1 strip, 3 ½” x 27”; 1 strip 3 ½” x 5”, 1 strip 3 ½” x 3”

 - Background Fabric: 1 strip, 3 ½” x 27”; 1 strip 3 ½” x 5”, 1 strip 3 ½” x 3”, and 1 strip 2” x 31/2”
 - Fusible Fleece: 1 strip 6 ½” x 25”

 - Lightweight Fusible Interfacing: 1 strip 3 ½” x 5”, 1 strip 3 ½” x 3”


Putting it All Together:

1. Iron the 3 ½” x 5” interfacing to the wrong side of the Main Fabric.


2. Iron the 3 ½” x 3” interfacing to the wrong side of the Main Fabric with a ¼” seam allowance.


3. With right sides together, sew the Main Fabric 3 ½” x 5” to the Background Fabric with a ¼” seam allowance. Turn fabric to right sides out and iron open. Sew ¼” from the top. This is the Lens Cap pocket.


4. With right sides together, sew the Main Fabric 3 ½” x 3” to the Background Fabric. Turn fabric to right sides out and iron open. Sew ¼” from the top. Fold the left and right edges together to make alight “middle crease (you’ll use that as a sewing guide when you pit it on the Main Fabric Strip!)

5. To make the single folded tape piece for the “ear,” with the right side facing the ironing board, fold the long bottom edge to the middle and press. Then fold long top edge to the middle and press.


To make the double-fold we need to iron it over one more time. Fold the tape in half, so that one side is just slightly wider than the other…about 1/16 of an inch….very small. (FYI, you just made a mini binding for a quilt. Kinda cool, huh?)

 Sew two lines down each edge as close as you are comfortable doing in order to keep the tab closed.


6. Sew the 3 ½” x 5” pocket to one end of the 3 ½” x 27” Main Fabric with the seamed side towards the middle using a scant ¼” seam allowance.


7. Place the 3 ½” x 3” pocket on the other end of the 3 ½” x 27” strip with the seamed side facing toads the middle, just like you did for the last pocket, and pin in place. Using the middle crease you made, sew up the middle towards the center of the Main Fabric and give yourself a few back stitches where the top of the pocket and the Main Fabric meet. This is where you put in your SD Cards and these pockets will get a lot of pulling.


8. Fold the “ear” tape tab in half. With the raw edges on the right edge of the fabric and the fold towards the center tack/sew it ½” up from the Lens Cap Pocket on the right side very, close to the edge and no further in that you ¼” seam allowance.


9. Layer the Main Fabric and the Background Fabric, right sides together, and pin to hold into place. With a ¼” seam allowance, sew the two together down the side that has the “ear.” Once sewn, open up and press towards the darker fabric.


10. Place the fusible batting, fuzzy side sewn, bumpy side up, on the ironing board and layer the strap, wrong side down (to the bumpy side). There should be ~ 1” of strap overage to the batting. Slowly press the fusible batting to the strap. Do not push or pull on the strap fabric as it will slide around in the beginning. More of an up and down pressing motion. Be careful, this stuff retains a LOT of heat, don’t burn your fingers!


11. Once it has cooled off, take fold over the lens pocket edge ¼” and iron. Fold it over again and iron for a nice hemmed edge. Sew as closely as you are comfortable with to the edge towards the middle of the strap first (to hold the sewing into place) then again sew near the edge of the outside . Repeat this same process for the SD Card pocket side.


12. Fold the raw strap edges together with the fuzzy batting side up and pin into place. With a ¼” seam allowance, sew the sleeve shut.


13. Carefully turn the strap right side out without pulling too hard on the just sewn edges. Take a wooden spoon handle or a thinner sewing ruler and once the sleeve is turned out, run the handle/ruler up and down the inside seams to help “shove” things back into place. With a warm, steamy iron, press it flat, manipulating the Background fabric to the underside and the Main Fabric to the top.

14. Using your sewing foot as a guide, move the machine needle all the way to the furthest right side it will go. Place the sleeve with the right edge up against the right side of the foot, using it as a guide. Very carefully and slowly sew, back up, and sew again the ends of the strap and then up the side. Once you get to the other end, sew, back-up and sew again the ends just like you did when you started this sewing run. Repeat the same process for the other side of the strap.
And there you have it!  These make WONDERFUL gifts to bring to your family photographer or just for yourself! I mean after all it IS a moral imperative that we coordinate with all of our GirlyGeek Gadgets! If you wanted to, you could even embroider your initials on the main Lens Cap pocket, or what ever suits your fancy! Enjoy!